

Making pepperoni sticks at home puts you in control of every step – from picking quality ingredients to achieving that perfect snap. This guide shows you exactly how to create these savory meat snacks in your kitchen.
Your pepperoni sticks need the right fat content, precise smoking temperatures, and carefully measured spices. The process works best with 21-millimeter collagen casings and specific spice combinations including paprika, salt, and cayenne pepper.
This guide covers everything you need to make professional-quality pepperoni sticks. You’ll learn about equipment selection, proper smoking methods, and essential techniques that work for both beginners and experienced cooks.
Equipment You Need for Pepperoni Sticks

Your pepperoni sticks need the right equipment to turn out perfectly. Let’s look at each tool you’ll use to make these savory snacks at home.
Pepperoni Sticks: Picking Your Meat Grinder
Manual grinders work well for small batches. These simple tools give you:
- Basic design that rarely breaks
- Easy fixes when needed
- Kitchen-friendly mounting options
- Lower cost than electric models
Electric grinders make the job easier. They offer:
- Fast grinding – 3 pounds every minute
- Solid, stable base
- Room for bigger meat pieces
- Better texture control
Stuffing Your Casings
Vertical stuffers handle most home projects well. Look for:
- Different tube sizes (12mm to 38mm)
- Strong steel parts
- Smooth-running gears
Your KitchenAid mixer works too – just add the stuffer attachment. For beginners, start with a small manual stuffer. Remember, stuffing works best with two people – one to run the stuffer, one to guide the casing.
Smoking Your Sticks
Electric smokers give you the best control. Follow these steps:
- 120°F, no smoke, 30 minutes
- 135°F with smoke, 1 hour
- 160°F, 1 hour
- 180°F until inside hits 165°F
Some recipes use longer times:
- 100°F, dampers open, 1 hour
- 125°F with smoke, 1.5 hours
- 150°F, 2 hours
- 175°F, 2 hours
- 200°F until inside reaches 150°F
Regular ovens work too, but you’ll miss that smoky taste.
Checking Temperatures
Good thermometers keep your sticks safe. Probe thermometers show:
- Temperature warnings
- Highest and lowest readings
- Timer options
Thin probes work great for skinny sticks. Wireless systems let you track temps from your phone, perfect for long smoking sessions.
Remember – right temperatures mean safe, tasty pepperoni sticks.
Ingredients That Make Perfect Pepperoni Sticks

Quality ingredients make the difference between good and great pepperoni sticks. Let’s look at what you need for that perfect snap and flavor.
Pepperoni Sticks: Meat Selection Basics
Traditional pepperoni combines pork and beef. This mix works best – pork adds juiciness while beef brings deeper flavor.
Beef chuck gives beginners the right start with its perfect fat content. Mix your meat to get 20% fat and 80% lean meat. Some recipes push the fat up to 30% for juicier sticks.
Game meat works too. Venison, moose, or elk need extra pork fat – mix them 70/30 or 60/40 (meat to fat). Clean your meat well, taking off silver skin and sinew before cutting it into small cubes.
Spice Mix for Real Pepperoni Flavor
Your pepperoni needs these spices:
- Sweet paprika (try some smoked paprika too)
- Black pepper
- Crushed fennel seeds
- Mustard powder
- Allspice and cinnamon
- Red pepper flakes
- Garlic powder
Some recipes add sugar for balance. Want extra tang? Try fermento or citric acid. Add salt separately – this lets you control the taste better.
Curing Agents for Safety
You can’t skip curing agents. Sodium nitrite does three things:
- Stops harmful bacteria
- Keeps the red color
- Adds classic pepperoni taste
Prague Powder #1 works best for regular pepperoni sticks. Measure carefully – use 1 teaspoon for every 5 pounds of meat. Too little won’t protect your meat, too much isn’t good for you.
For long-term curing, use Prague Powder #2. Mix everything in plastic or glass bowls – metal or wood can cause problems.
Pepperoni Sticks: Picking Your Casings
Your casing choice shapes your pepperoni sticks:
Fibrous casings (38mm) make traditional pepperoni. Soak them in warm water (100°F) for 30 minutes.
Collagen casings (21mm) need no prep work. They’re perfect for snack sticks – each one holds 5 pounds of meat.
Natural sheep casings need more work – rinse and soak them overnight. Add baking soda to the soaking water for better stretch.
Whatever casing you pick, load it right. Use your biggest stuffing tube and tie one end first.
Preparing Meat for Your Pepperoni Sticks
Perfect pepperoni sticks start with properly prepared meat. The right mix of lean meat and fat, correct grinding technique, and careful temperature control make the difference between good and great results.
Getting the Meat-Fat Balance Right
The best pepperoni sticks use a specific meat-to-fat ratio between 70:30 and 80:20. Traditional American pepperoni contains 70% lean meat and 30% fat. Less fat makes dry, crumbly sticks. More fat causes grinding problems and cooking issues.
Game meat needs special handling. Mix 50% venison with 50% pork trim (about 50% fat content). This keeps the wild flavor while giving the right texture.
Pepperoni Sticks: Grinding Your Meat Right
Pepperoni texture comes from proper grinding. Aim for 2-3 millimeter pieces – fine enough to bind well but still showing meat and fat separately.
Most recipes use two grinding steps:
- First grind: Coarse plate (6mm or 3/8″)
- Second grind: Fine plate (4.5mm or 3/16″)
Some pepperoni makers add spices before the first grind. This spreads flavor better than mixing spices in later.
Cut meat into small, clean cubes that fit your grinder. Even with pre-ground meat, grind again for better texture.
Watching Your Temperatures
Keep meat below 34°F (1.1°C) while grinding and mixing. Warm meat turns mushy. At 100°F, fat melts away, ruining your pepperoni.
Temperature control tips:
- Chill meat until nearly frozen
- Freeze grinder parts for 20 minutes
- Work in small batches
- Use ice under mixing bowls
- Partially freeze meat between grinds
Well-mixed meat sticks to your palm when squeezed. Using citric acid? Cook your sticks the same day.
Making Your Pepperoni Spice Mix
The right spice blend turns regular meat into real pepperoni. Your mix needs exact measurements and proper mixing steps to create that classic pepperoni taste.
Basic Pepperoni Spices
Paprika leads the spice mix, giving pepperoni its orange-red color. Your basic pepperoni needs:
- Sweet paprika (mix in some smoked paprika for extra flavor)
- Fresh ground black pepper
- Crushed fennel seeds or anise
- Garlic powder only – fresh garlic spoils faster
- Mustard powder
- Allspice, cinnamon, and cloves
Some recipes add nutmeg for more flavor. Start with 2 teaspoons paprika, 1-2 teaspoons black pepper, and 1-1.5 teaspoons crushed fennel per 2 pounds of meat.
Pepperoni Sticks: Setting Your Heat Level
Red pepper flakes or cayenne pepper make pepperoni spicy. Choose your heat:
- Mild: ½ teaspoon flakes per 2 pounds
- Medium: 1 teaspoon flakes
- Hot: 1½ teaspoons or more
Too spicy? Add more paprika to calm the heat. Milk powder works too.
Mixing Your Spices Right
Weigh your spices instead of measuring by volume. Break up any lumps first. Mix all dry spices together before they touch the meat. Some people grind everything fine, others like crushed seeds for texture.
Add spices to meat in 3-4 batches. Mix each batch well. Many pepperoni makers mix spices with wine first. This spreads flavor better.
Cook a small test patty before stuffing all your meat. This lets you fix the seasoning if needed.
Mixing and Testing Your Pepperoni Mix
The mixing stage makes or breaks your pepperoni sticks. Your meat needs the right consistency and perfect flavor balance before stuffing.
Getting the Right Mix
Keep meat below 34°F (1.1°C) while mixing. Cold meat prevents fat problems and helps proteins bind better.
Mix until your meat turns sticky. Test it this way: grab some mixture, flip your hand over – the meat should stick to your palm.
Add ingredients in this order:
- Meat, spices, binder, liquid
- Mix until sticky
- Add citric acid last if needed
Watch your timing with citric acid – cook these sticks the same day. The acid coating breaks down fast and ruins texture.
Testing Your Mix
Cook a small test patty before stuffing everything. Make it silver-dollar-sized. Check for:
- Salt level
- Spice balance
- Heat level
- Texture quality
Advanced makers check pH levels too. Good pepperoni hits 4.6-4.8 pH. Using cultures? Test after 16 hours – pH should drop below 4.9.
Final Tweaks
Fix your seasoning now. Add spices bit by bit. Remember – you can add more, but can’t take it out.
Mixture too dry? Add ice-cold water, 1 teaspoon at a time. Too wet? Keep mixing to bind moisture.
Using cultures? More dextrose helps if the pH stays high. Cultures make the tangy flavor and help preservation.
Mix well but don’t overwork. Use glass or plastic bowls – metal fights with curing agents.
Ready to stuff? Do it now. Don’t wait, especially with citric acid or cultures.
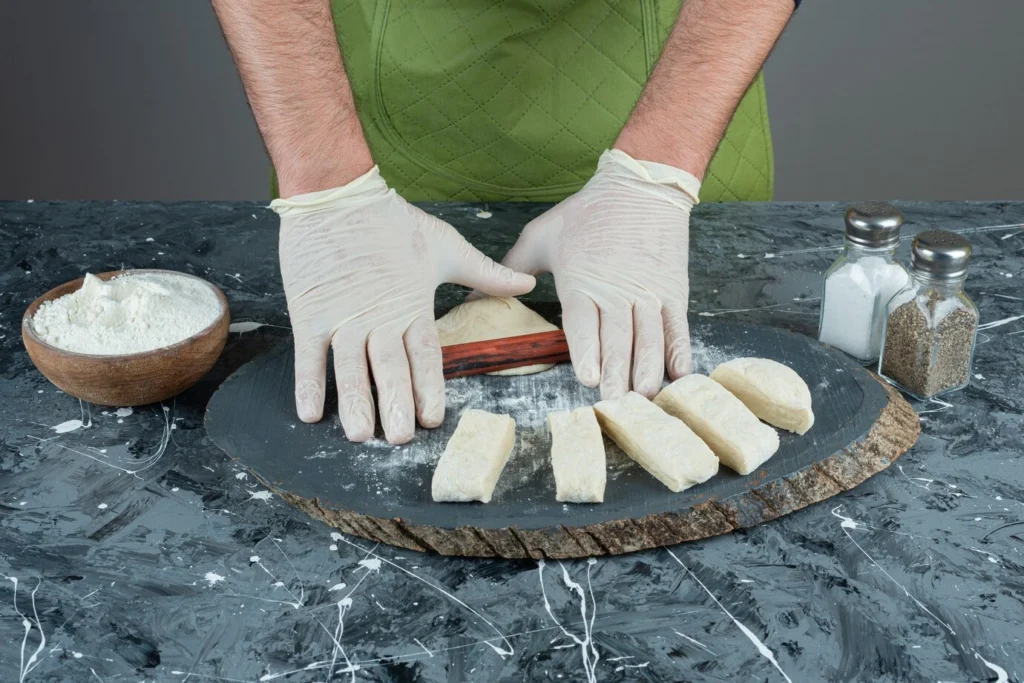
Stuffing Your Pepperoni Sticks Right
Perfect pepperoni sticks need proper stuffing technique. Your success depends on how well you load, stuff, and link your meat mixture.
Loading the Stuffer
Keep meat cold – below 34°F (1.1°C) before stuffing. Vertical stuffers work better than grinder attachments.
Load your stuffer this way:
- Press small portions of meat firmly
- Remove all air pockets
- Fill the cylinder completely
This stops air bubbles in your sticks. Put olive oil on stuffing tubes when using collagen casings.
Controlling Your Stuffing
Stuffing needs two things: steady pressure and right casing tension. Move the crank smoothly – no jerky motions. Watch how fast the casing slides off.
Thin casings (19mm or 21mm) need more tension. Pack firmly but don’t stretch too much. Good stuffing shows meat through pricked holes.
Regular stuffers beat grinder attachments. They keep meat texture better, which helps your sticks dry and ferment right.
Making Your Links
Make 5-6 inch links after filling your casing. Pinch where you want the link, then twist firmly one way.
Many makers prefer 10-inch “chubs” with zip ties. These hang better for drying and smoking. Natural casings need twisting both ways to stay linked.
Prick your sticks with a toothpick to let air out. This stops casings from breaking while cooking and helps even drying.
Smoking Your Pepperoni Sticks
Smoking turns raw pepperoni into tasty, shelf-stable snacks. Your temperature control and timing make the difference between good and great sticks.
Starting with the Dry Phase
Start your sticks at 120-130°F, no smoke, for 30-60 minutes. Keep dampers wide open for moisture release. This dries your casings for a better smoke grip. Skip this step? Your sticks won’t smoke right.
Moving Through Temperatures
Follow these steps for perfect sticks:
- 100°F (37.7°C), dampers open, 1 hour
- 125°F (51.6°C), add smoke, 1.5 hours
- 150°F (65.5°C), smoke optional, 2 hours
- 175°F (79.4°C), no smoke, 2 hours
- 200°F (93.3°C) until inside hits 150°F (65.5°C)
This slow heat keeps fat in your sticks. Want something simpler? Smoke at 150°F for 3 hours, then 200°F until done.
Picking Your Wood
Wood choice changes your pepperoni’s taste. Apple and cherry woods give mild, sweet smoke. Cherry adds a nice color too. Want stronger flavor? Hickory works great with pork. Don’t smoke longer than 2 hours – pepperoni takes smoke fast.
Checking for Doneness
Your sticks need to hit 145-155°F inside. Then cool them:
- Ice bath until 90-100°F inside
- Or hang to cool at room temp
Done right, your sticks snap when you bite them.
Storing Your Pepperoni Sticks
Good storage keeps your pepperoni sticks fresh and tasty. Your storage method decides how long they last and how well they keep their flavor.
Cooling and Drying Steps
Cool your sticks in ice water until they hit 90-100°F. Let them hang and “bloom” for better flavor. Some makers dry them for more – than 3.5 hours at 145°F in a dehydrator makes them snappier. Butcher paper works great for extra drying – wrap and chill for a week before freezing.
Fridge Storage Rules
Fresh pepperoni lasts 2-3 weeks in the fridge after opening. Use sealed containers or bags, keep below 40°F. Put sticks back in the fridge right after using them. Even with salt and preservatives, opened pepperoni needs cold storage.
Freezing for Later
Freezing keeps pepperoni longer. Cut sticks into serving sizes first. Wrap each piece in plastic several times before bagging. Push all air out to stop freezer burn. Frozen sticks stay good 6 months. Thaw in your fridge overnight, eat within 24 hours.
Vacuum Sealing Works Best
Vacuum sealing stops spoilage by removing air. This keeps flavor better and prevents freezer burn. Stores must use sealed pepperoni within 7 days unless tested. Home vacuum-sealed sticks last 2 weeks in the fridge or 6 months to 2 years frozen, based on how dry they are.
Making Great Pepperoni Sticks at Home
Homemade pepperoni sticks need attention to detail. Your success comes from watching temperatures, picking good ingredients, and following each step carefully.
Temperature control makes the biggest difference in your results. Cold meat (below 34°F) during prep, right smoking temperatures, and proper cooling give you safe, tasty sticks. Good storage keeps them fresh longer – whether you choose your fridge or vacuum sealing.
Start small, learn as you go, and soon you’ll make pepperoni sticks that beat anything from the store. The time and care pays off when you bite into that perfect stick you made yourself.